Tuesday, October 16, 2012

Spiced Blondies with a Ginger Snap Crust


I came across a recipe for Chai Spiced Blondies and put them on my list of things to bake and bless my husband with. When I went for the ingredients, the Cardamom was a crazy price that I, a person with a tight grocery budget, was not going to pay. So, while standing in our little amish style corner store, I began to ponder. How can I make this work? I knew that at some point in time, I had a carton of Chai liquid concentrate in my pantry. Hopefully that was still there and could be added to flavor these and save the chai concept. Nope. Not there. Plan C came about and with it came a simple spiced blondie with, after I spotted the ginger snaps in the pantry where the chai drink was supposed to be, a ginger snap crust. That is the fun part about cooking and baking! The flavor possibilities are many and you can make things your own. I hope you try these and enjoy them as much as my husband and kids did!

Preheat oven to 350 degrees

Ingredients for the crust:
2 cups of ground gingersnap crumbs
1/2 stick of melted butter
Food process about half a bag of gingersnaps and combine with the melted butter. Press into a greased 9x12 glass baking dish. Bake for 8 minutes. Remove from oven and allow to cool for 10 minutes.

Ingredients for the blondie:
2 sticks of softened butter
1/2 cups of packed brown sugar
2 eggs
1/4 cups plain yogurt
1 TBSP of vanilla
2 2/3 cups of unbleached flour

2 tsps of baking powder
1 tsp salt
2 tsp cinnamon
1 tsp nutmeg
1/2 tsp ginger
1/2 tsp cloves
1/2 coriander

Thoroughly whip up the butter and sugar until light and fluffy. While it mixes, combine the dry ingredients in a seperate bowl. Into the fluffy butter and sugar, add in eggs, yogurt and vanilla. With mixer on low, slowly add in the dry ingredients until it's just incorporated. Scrape sides down with a spatula and stir to combine. Put dough out onto the cooled crust and press out evenly using warm water to keep your hands damp. This allows you to press out the dough without it sticking to your fingers. Bake at 350 for 25 minutes. Check with toothpick to make sure they're done.


Then you are obligated to enjoy them as much as she did with her milk! Haha!


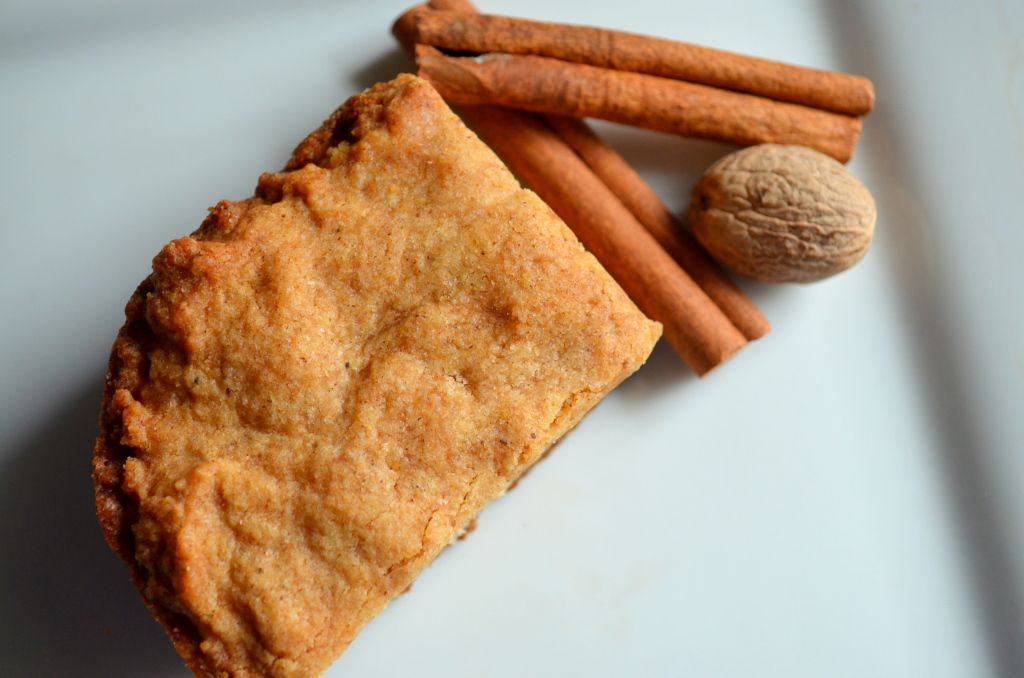
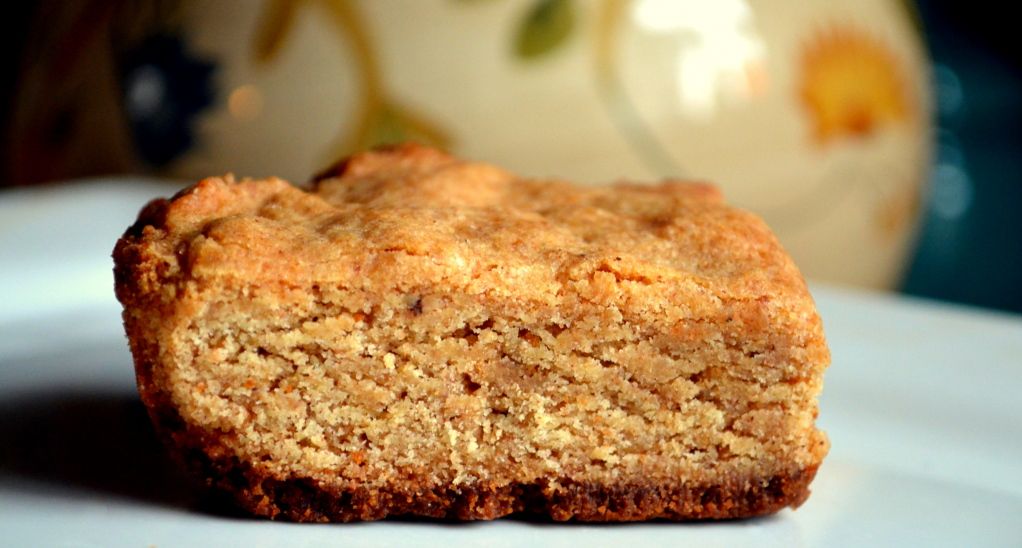
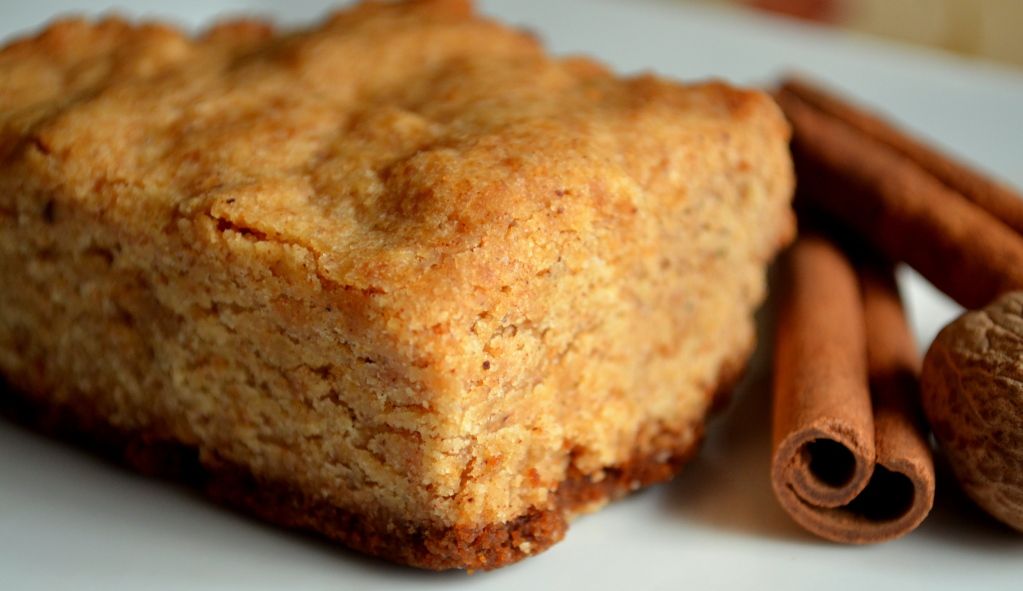
This bar cookie made for some pretty pictures so I added them just for fun!  


Monday, October 15, 2012

Sweet Butternut Squash Bisque

 
Fall in a bowl!


This is a butternut squash.


Preheat oven to 400 degrees
Ingredients:
2 butternut squash
4-5 cups of milk
1 TBSP cinnamon
1/2 cups of maple syrup
1 tsp nutmeg
1/2 tsp salt

Slice the squash and take the seeds out. Place face down on a baking pan and roast for 1 hour.


Check all pieces for softness, removing those that are soft and continuing to bake those that are still a bit hard. Once cooled, scoop the squash out of skin and put a quarter of the squash in the blender at a time with 1 of the cup of milk. Continue to blend in parts until all is smooth and back into the pot. Add the additional ingredients as you warm the soup in a large pot. Taste for seasoning. If it's still too thick just add a bit more milk or syrup.


Enjoy!!!

Wednesday, October 3, 2012

Garlic, Herb and Parmesan Crusted Bread


Making bread.
 It can be an intimidating thought but if you have a few key tips, you'll be a success at it every time! I'll fill you in. I find that most recipes say luke warm water and that seems to be where a lot of people get confused. Luke warm water means that when you touch the water it feels cool and hot at the same time. Yeah, like that clears it up! My motto is when you touch the water it's warm but on the hotter side of warm. Think of the temperature you would make the water for your little one to wash their hands and then use that.  Yeast is a touchy ingredient, if the water is too cold, the yeast doesn't wake up. If it is too hot, then the yeast dies. It's much easier to show you in person but alas, that is clearly not happening. Be encouraged, the temperature of the water is a step in breadmaking that will quickly become familiar.
 
Ingredients:
1 TBSP yeast
1 1/2 cups of warm water
2 tsp sweetener- sugar, brown sugar, honey etc
4 cups of unbleached flour
2 TBSP extra virgin olive oil
1 tsp salt
 
For the crust rub
1 clove of garlic- zested into a paste
salt
dried italian herbs
grated parmesan cheese
 
*My preference is to use my KitchenAid mixer to knead my bread. You can also do this in a bowl and knead with your hands or use a bread machine on the dough setting. All three ways will get the same end result*
 
With your dough hook attatchment, begin with the water, yeast and sweetener. (A sweetener of some sort is necessary. The yeast reacts with the sweetener to become active) Mix to combine. Add in the olive oil. Gradually add the flour in, adding the salt in with the last cup of flour. You will have to stop the mixer to scrape down the sides. Once a dough has formed, leave the mixer on medium speed for 5 minutes. Turn off the mixer and form into a ball in the mixing bowl. Cover the whole ball of dough with olive oil and set in a warm place, covered with a towel. Let rise for 15 minutes. Pre-heat the oven to 350 degrees. Remove and divide the dough into two equal parts. Form one part into a loaf shape. Set other dough ball aside.
 
Grate the clove of garlic onto a plate. Drizzle the top of the loaf with olive oil and spread the grated garlic evenly onto the top of the dough. Sprinkle with any italian herbs you have. Continue with a light sprinkle of salt and parmesan cheese. Bake at 350 for 25 minutes. Until top is golden brown. (If you don't want to grate the garlic, you could substitute it with garlic powder and simply sprinkle it on followed with the salt, herbs and cheese)


*The extra dough ball can either be another loaf of bread, a pizza crust OR  my choice were these delicious cinnamon rolls. ENJOY!